Monday, October 31, 2011
Thursday, October 27, 2011
Libman Facebook Giveaway today from 1-4 PM CST
The first 500 entries will win a microfiber cleaning pad for their Freedom Spray Mop from Libman! Giveaway will be from 1-4 PM CST TODAY https://www.facebook.com/libma
Wednesday, October 26, 2011
Wordless/Not so Wordless Wednesday

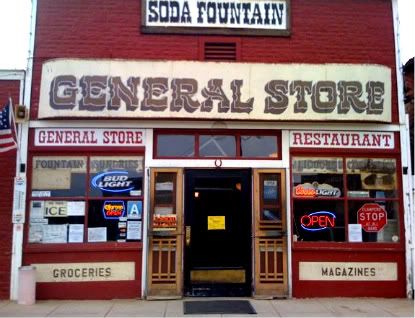
Can I buy a vowel, please?
How about that for a paint job? We spotted this one while out shopping.
Sunday, October 23, 2011
Sunday Scavenger Hunt
These are my pictures for this week's Sunday Scavenger Hunt. If you would like to join in on the fun, check out Ramblings and Photos: Sunday Scavenger Hunt.
Words
Under- the sea
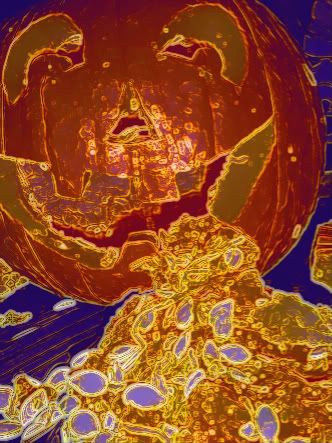
Orange- For this picture, I just wanted to have some fun playing with some different editing tools.
Fly- This is a picture of a dragon fly I snapped a picture of a few weeks ago.

Always look on the bright side

Words

Under- the sea
Orange- For this picture, I just wanted to have some fun playing with some different editing tools.

Fly- This is a picture of a dragon fly I snapped a picture of a few weeks ago.

Always look on the bright side

Friday, October 21, 2011
Aloha Friday
My question for Aloha Friday is : What is the one activity you look forward to the most during Fall?
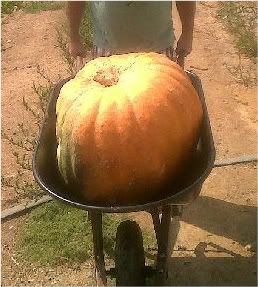
I have to say that my favorite activity during the fall is going to the pumpkin patch. My husband and I started going out to get pumpkins way before we ever had children. My husband likes to find the biggest pumpkin he can find. Now with children, it's even more fun. This year's pumpkin wouldn't fit in our car, so we had to call for back up to get it home. Thankfully, the patch we love to go to isn't very far from home.
I have to say that my favorite activity during the fall is going to the pumpkin patch. My husband and I started going out to get pumpkins way before we ever had children. My husband likes to find the biggest pumpkin he can find. Now with children, it's even more fun. This year's pumpkin wouldn't fit in our car, so we had to call for back up to get it home. Thankfully, the patch we love to go to isn't very far from home.
Thursday, October 20, 2011
Party City Coupon, $5/$30 purchase, good TODAY ONLY!
If you have some last minute Halloween shopping, Party City has a coupon good for TODAY ONLY! Save $5 off your purchase of $30 or more. http://www.partycity.com/text/
Plus, they also have some deals on last minute Halloween costumes.
Transformer coupon on Facebook
If your kids are into Transformers, this is the coupon for you! Become a fan of Transformers on Facebook. You will be able to print a $5/1 coupon. The coupon will only be available for a limited time.
This would be a great coupon to use to at Target.
Transformers- $7.99
use $5/1 coupon
Total: $2.99
This would be a great coupon to use to at Target.
Transformers- $7.99
use $5/1 coupon
Total: $2.99
So you live in a haunted house
I personally don't live in a haunted house, but I know someone who did. My husband thinks I am crazy for believing it, but he has never visited the house in question. My aunt and uncle and their 4 children lived in a haunted house.
They purchased the house in the 60's and over a few years did renovations and added a major addition to the home and grounds by adding on to the existing house, building a pool, guest house, and barn. After all of this was complete, that is when strange things began to occur. Over the years, my aunt always joked about living in her haunted house, but would never really talk about anything that she saw or experienced. Her daughter is the same way, to this day she will not talk about anything she saw or experienced in that house.
My cousins are all older then I am, so when Anne got married I was rather young. I would say around 5 or 6 years old. I remember hearing family members whispering about her wedding gifts getting mysteriously moved around her room or they would find gifts in strange places. I also remember family members talking about a strange motorcycle that would drive toward the house and then disappear.
I never experienced seeing anything like that, but I was always afraid to go to the back part of the house by myself. The floor plan of the home was open, if you entered through the front door, you could go left into the kitchen, right to the bedrooms, or straight ahead to a large living room. I never liked going back to the bedroom/bathroom area of the house. Once you got back there, you always felt that you were being watched and that something heavy was pressing on you. That part of the house was always colder then the other parts of the house.
I was checking out HGTV's website and came across the top 5 tips for living and thriving with a haunted house. My aunt and her family lived and thrived in a haunted house for over 30 years. They sold the house in the 90's because they didn't need such a large home anymore and decided to downsize. What is funny, is that they sold the home to another family that we know. The house again went through some remodeling and occasionally, they will mention having a strange feeling in the house.
I would love to have the house investigated by a paranormal investigator. I truly believe something is there.
Monday, October 17, 2011
Menu Plan Monday
The weather here is starting to get colder. We actually have had little bit of frost in the morning! Lately, I have really been craving some chicken and dumplings, so it is on the menu this week. I am also sharing a recipe fro Stuffed Cheese Rolls. My mom used to make these a lot when I was a kid. They are one of my favorite things. They are quick and easy to make and they freeze beautifully.
Monday- Grilled Vegetable Fajitas and Spanish rice with guacamole and pico de gallo.
Tuesday- Chicken and dumplings with roasted cinnamon apples
Wednesday- Stuffed Cheese Rolls and fruit salad.
Here is the recipe for Stuffed Cheese Rolls.
Ingredients:
1 bag of French dinner rolls
2 cups shredded cheese
1 small onion, finely chopped (it makes it hard for my selective eater to spot them)
1 can of chopped olives
1 small green pepper, finely chopped
1 can of tomato sauce
garlic and Italian seasoning to taste
Cut the ends off of the dinner rolls and hollow out the insides.

But the bread in a bowl.
Add tomato sauce, onions, olives, green peppers, spices, and cheese to the bread.
Mix well.
Stuff the mixture into the rolls.
Using the end that was cut off, put on top of stuffing mixture. Then wrap in tin foil.

Bake at 350 for about 15- 20 minutes or until inside is warm and melted
Thursday- Chicken Tortilla Soup and Salad
Friday- Red Curry Tofu, steam rice and stir fried veggis
Saturday and Sunday are YOYO days.
This post is linked to Menu Plan Monday.
Monday- Grilled Vegetable Fajitas and Spanish rice with guacamole and pico de gallo.
Tuesday- Chicken and dumplings with roasted cinnamon apples
Wednesday- Stuffed Cheese Rolls and fruit salad.
Here is the recipe for Stuffed Cheese Rolls.
Ingredients:
1 bag of French dinner rolls
2 cups shredded cheese
1 small onion, finely chopped (it makes it hard for my selective eater to spot them)
1 can of chopped olives
1 small green pepper, finely chopped
1 can of tomato sauce
garlic and Italian seasoning to taste
Cut the ends off of the dinner rolls and hollow out the insides.

But the bread in a bowl.
Add tomato sauce, onions, olives, green peppers, spices, and cheese to the bread.

Mix well.
Stuff the mixture into the rolls.
Using the end that was cut off, put on top of stuffing mixture. Then wrap in tin foil.

Bake at 350 for about 15- 20 minutes or until inside is warm and melted
Thursday- Chicken Tortilla Soup and Salad
Friday- Red Curry Tofu, steam rice and stir fried veggis
Saturday and Sunday are YOYO days.
This post is linked to Menu Plan Monday.
Carmel Apple Smoothie
I found this recipe on the Silk Facebook page and I can't wait to give it a try. My family and I have been drinking more almond milk lately. I wasn't sure how well I would like it because I am not really a milk fan. But I really love it.
Carmel Apple Smoothies
1/2 cup apple juice
1 cup Silk Vanilla soy or almond
1 medium tart apple (peeled and cored)
3 tbsp caramel sauce
6 ice cubes.
Blend until smooth.
Sunday, October 16, 2011
Sunday Scavenger Hunt
These are my pictures for the Sunday Scavenger Hunt. If you would like to join in on the fun, check out Ramblings and Photos: Sunday Scavenger Hunt
abstract
round

fire
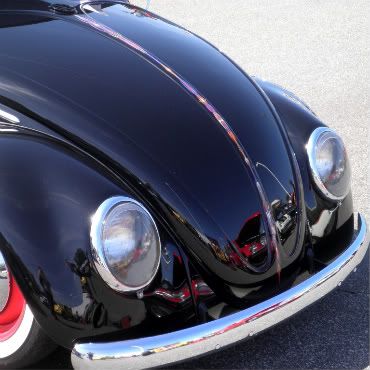
faces in strange/unexpected places- We went to a VW show. I love bugs, they always make me happy. I guess it is because they are always smiling.
stars- For some reason, I just could not get anything I liked for this one. I thought that this would have been the easiest one to get.
abstract

round

fire

faces in strange/unexpected places- We went to a VW show. I love bugs, they always make me happy. I guess it is because they are always smiling.

stars- For some reason, I just could not get anything I liked for this one. I thought that this would have been the easiest one to get.
Free Barista Prima K-Cup Sample pack
Target’s Sample Section to request your sample pack of Barista Prima K-Cups. These generally go quickly, so get yours while you can! I absolutely love K-cups, because I don't drink a lot of coffee at home and just enjoy it once in a while.
Friday, October 14, 2011
Harry Potter Inspired Halloween Decorations
My family and I love the Harry Potter books and movies. Halloween is the perfect time to share some of our re-created props that we use around the house during Halloween.
I thought I would share a little tutorial about making a Harry Potter Grim Teacup. This is a really inexpensive prop to recreate and it is easy for children to make. If you aren't really familiar with the movies or the books, the first mention of the Grim comes from book The Prisoner of Azkban. Harry learns that the Grim is an omen from Professor Trelawney's divination class. The Grim takes the shape of a large, black, shaggy dog which is seen in the bottom of Harry's teacup.
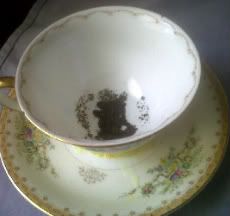 I picked up a great little teacup and saucer at my local Goodwill for $1. I was looking for something that I thought you might find at an English tea party. I was shocked when I found such a beautiful cup and saucer and my Goodwill.
Using 2 part Apoxy glue, I attached the cup and saucer together and allowed them to dry. Some of my apoxy seeped out so I have to go back and scrape it off. So be careful, you want to use a enough for it to stick together, but not too much to cause seepage. Also, if you are working with younger children, this is a step that you will want to do.
Then using a teabag and plain white glue I sprinkled the tea leaves inside the cup. I tried to create what looks like a dog howling on the inside. This project is easy to do in just a few hours.
The second project is one that I absolutely love and wanted to try to recreate one for our home. The Monster book is seen in The Prisoner of Azkaban. After some thought, I finally figured out how I would make it. This project is fairly inexpensive to make. I would say the grand total for the project is somewhere around $6 to $7. But some of the materials I already had on hand.
This is a list of materials you will need:
1 large book I used one of my old college text books that I still had. But, you could find something suitable at the Goodwill or other thrift store.
1 package of teddy bear eyes, These can be found at your local craft store, with doll making supplies.
faux fur, you will need enough to cover your book.
modeling clay
hot glue
gold and black spray paint
fake teeth I purchased a pair at the $ store for this project.
gold scrapbook letter stickers
Step 1. Once you have selected a book, lightly spray paint the page edges gold. Allow time for those to dry.
Step 2. Using the modeling, sculpt mounds for the eyes.
Step 3. Cover the book with faux fur and use hot glue to hold in place. You will want some extra on the book opening side to create tentacles.
Step 4. Make small holes to insert the eyes into place.
.jpg)
Step 5. Create tentacles by by folding and gluing pieces together, cut off excess.
 Step 6. Lightly spray paint the faux fur black and allow for dry time. Apply the stickers to the fur.
Step 7. Glue teeth into place.
 It is not movie accurate, but you get the idea and looks great especially if you dress up as any of the Harry Potter characters. I hope you enjoyed this craft post. Please let me know if you make one for your family.
Equipment:
Microwave
Wooden spatula
1-2 Plastic Frog Molds ( I purchased a frog candy mold from Amazon.com. The mold I purchased makes 8 frogs at a time.)
Microwave safe mixing bowl
Ingredients:
One 12 oz. package of semi-sweet chocolate chips or a 12 oz. package of white chocolate chips,
rice krispie cereal
We melted the chocolate in the microwave. Check and stirring every 15-30 seconds until smooth and melted.
 I used cooking spray to coat the molds. Then we spooned melted chocolate into the molds. I gently tapped the molding tray on the counter to remove any air bubbles.
After the molds were filled. We placed them in the refrigerator to cool. Once they were completely cooled, we popped them out of the mold.
 We made another batch using the white chocolate chips and some fruity pebbles cereal for some extra color. We played around with the texture on these. We tried crushing the cereal and sprinkled it in the molds. Then we did more, where we crushed the cereal and add it to the melted chocolate.
The final result was a plate of chocolate frogs that any wizard would be happy to snack on.
disclosure: These are not original props, they are fan made replicas made for personal use.
I thought I would share a little tutorial about making a Harry Potter Grim Teacup. This is a really inexpensive prop to recreate and it is easy for children to make. If you aren't really familiar with the movies or the books, the first mention of the Grim comes from book The Prisoner of Azkban. Harry learns that the Grim is an omen from Professor Trelawney's divination class. The Grim takes the shape of a large, black, shaggy dog which is seen in the bottom of Harry's teacup.
 I picked up a great little teacup and saucer at my local Goodwill for $1. I was looking for something that I thought you might find at an English tea party. I was shocked when I found such a beautiful cup and saucer and my Goodwill.
 Using 2 part Apoxy glue, I attached the cup and saucer together and allowed them to dry. Some of my apoxy seeped out so I have to go back and scrape it off. So be careful, you want to use a enough for it to stick together, but not too much to cause seepage. Also, if you are working with younger children, this is a step that you will want to do.
Then using a teabag and plain white glue I sprinkled the tea leaves inside the cup. I tried to create what looks like a dog howling on the inside. This project is easy to do in just a few hours.
The second project is one that I absolutely love and wanted to try to recreate one for our home. The Monster book is seen in The Prisoner of Azkaban. After some thought, I finally figured out how I would make it. This project is fairly inexpensive to make. I would say the grand total for the project is somewhere around $6 to $7. But some of the materials I already had on hand.
This is a list of materials you will need:
1 large book I used one of my old college text books that I still had. But, you could find something suitable at the Goodwill or other thrift store.
1 package of teddy bear eyes, These can be found at your local craft store, with doll making supplies.
faux fur, you will need enough to cover your book.
modeling clay
hot glue
gold and black spray paint
fake teeth I purchased a pair at the $ store for this project.
gold scrapbook letter stickers
Step 1. Once you have selected a book, lightly spray paint the page edges gold. Allow time for those to dry.
Step 2. Using the modeling, sculpt mounds for the eyes.
Step 3. Cover the book with faux fur and use hot glue to hold in place. You will want some extra on the book opening side to create tentacles.
Step 4. Make small holes to insert the eyes into place.
.jpg)
Step 5. Create tentacles by by folding and gluing pieces together, cut off excess.
 Step 6. Lightly spray paint the faux fur black and allow for dry time. Apply the stickers to the fur.
 Step 7. Glue teeth into place.
 It is not movie accurate, but you get the idea and looks great especially if you dress up as any of the Harry Potter characters. I hope you enjoyed this craft post. Please let me know if you make one for your family.
 Lastly, no Harry Potter themed Halloween would be complete without some chocolate frogs. Here is a list of everything we used to make our chocolate frogs.
Equipment:
Microwave
Wooden spatula
1-2 Plastic Frog Molds ( I purchased a frog candy mold from Amazon.com. The mold I purchased makes 8 frogs at a time.)
Microwave safe mixing bowl
Ingredients:
One 12 oz. package of semi-sweet chocolate chips or a 12 oz. package of white chocolate chips,
rice krispie cereal
We melted the chocolate in the microwave. Check and stirring every 15-30 seconds until smooth and melted.
 I used cooking spray to coat the molds. Then we spooned melted chocolate into the molds. I gently tapped the molding tray on the counter to remove any air bubbles.
After the molds were filled. We placed them in the refrigerator to cool. Once they were completely cooled, we popped them out of the mold.
 We made another batch using the white chocolate chips and some fruity pebbles cereal for some extra color. We played around with the texture on these. We tried crushing the cereal and sprinkled it in the molds. Then we did more, where we crushed the cereal and add it to the melted chocolate.
 The final result was a plate of chocolate frogs that any wizard would be happy to snack on.
disclosure: These are not original props, they are fan made replicas made for personal use.
Thursday, October 13, 2011
Edible Eyeball Treats
This is a quick little treat that will be easy to make with children. You will need the following ingredients:
small powdered sugar doughnuts
gummi lifesavers
vanilla frosting, tinted red
mini chocolate chips
popcicle or lollipop sticks
1. Take the powdered sugar doughnut and pipe or spread a small amount of frosting onto the center of the doughnut.
2. Stick a gummie lifesaver onto the frosting. Place a chocolate chip in the center. For an extra effect, you can pipe icing to make the eyes look bloodshot.
3. Insert a stick into the bottom of the doughnut.
The finished product is something fun for kids of all ages!
Cheese Olive Bites
This is one appetizer that I love to make. They are quick and easy, and they are great for tailgating, cocktail parties, or just any time. I love to make them around Halloween, because if you cut them in half, they make great alien eyeballs.
Cheese Olive Bites
medium pimiento-stuffed olives, drained
4 ounces butter (1 stick)
1 (5-ounce) glass Kraft Olde English Cheddar cheese ( the recipe I have calls for this type of cheese, but I have a hard time finding it. So I just use about a cup of sharp cheddar cheese grated. )
1 1/4 cups flour
Dash salt
OPTIONAL : for a little extra spice, you can add a little cayenne pepper to the dough mixture.
Pat olives with paper towels to dry thoroughly. Cut butter and cheese into flour. Add salt. Form into small balls around olives; seal well. Chill 8 hours or overnight in refrigerator. Bake at 400° for about 15 minutes or until browned. Makes about 48 appetizers.
Wednesday, October 12, 2011
Pumpkin Patch Party
One of my friend's son just turned 1. I just loved her idea for his birthday party. Emily decided to host an at home pumpkin patch party. She and her other children planted their own pumpkin patch back in the summer so that it would be ready in time. I really admire her for thinking so far in advance. I don't know if I would have the organization or the green thumb to pull something like this off.
For her son's cake, she made a pumpkin spice bundt cake and decorated it to look like a jack o'lantern. For her guest, she made these adorable cake pops. Emily made 3 different flavors of cake pops, red velvet, chocolate, and vanilla butter cake. The cake pops are dipped in white chocolate with orange food coloring, the stems are pretzel rods, and the leaves are green M&Ms cut in half.
I really love how she used the mini hay bales to sever all of the cake pops.

She also made pumpkin and fall leaves Rice Krispie treats, which also turned out adorable.
After everyone had cake and treats, the children got to decorate their own mini pumpkins.
I thought this was such a cute and creative way to celebrate a first birthday.
For her son's cake, she made a pumpkin spice bundt cake and decorated it to look like a jack o'lantern. For her guest, she made these adorable cake pops. Emily made 3 different flavors of cake pops, red velvet, chocolate, and vanilla butter cake. The cake pops are dipped in white chocolate with orange food coloring, the stems are pretzel rods, and the leaves are green M&Ms cut in half.
I really love how she used the mini hay bales to sever all of the cake pops.

She also made pumpkin and fall leaves Rice Krispie treats, which also turned out adorable.
After everyone had cake and treats, the children got to decorate their own mini pumpkins.
I thought this was such a cute and creative way to celebrate a first birthday.
Scared Shrekless and Monsters vs. Aliens Mutant Pumpkins DVD 2 pack
If you are looking for a fun Halloween double feature, that is family friendly, you may want to check out this double feature from DreamWorks Animation. The double DVD pack includes Scared Shrekless along with Monsters vs. Aliens: Mutant Pumpkins from Outer Space, and an all new Shrek parody of Michael Jackson's "Thriller" music video. My family really loved both of these Halloween features. We really had a great pre-Halloween movie night.
Synopsis:
In Scared Shrekless, the gang gathers to celebrate Shrek's favorite holiday, which is Halloween. But instead of the usual tricks or treats, Shrek up the ante and challenges everyone to spend the night telling scary stories- the last one scared Shrekless wins. The DVD includes spooky spoofs on classic horror movies and features the voices of Mike Meyers, Cameron Diaz, and Antionio Banderas.
Monsters vs. Aliens: Mutant Pumpkins from Outer Space finds Susan, BOB, The Missing Link and Dr. Cockroach dispatched as special operatives to investigate a mysterious alien presence on Halloween. As the night unravels, innocent-looking pumpkins are revealed for what they really are- mutant aliens. Luckily the monsters are there to smash the mutants' wicked scheme to take over Earth. Monsters vs. Aliens: Mutant Pumpkins from Outer Space features the star studded cast of voice talent from the original hit film, including Reese Witherspoon, Seth Rogen, Hugh Laurie, Will Arnett, Kiefer Sutherland, and Rainn Wilson.
Monday, October 10, 2011
Menu Plan Monday
This week is a crazy week in our house. So all of my meals this week, are going to be quick and easy.
Monday- Taco Night
Tuesday- Breakfast for Dinner- cheesy scrambled eggs, bacon, and toast
Wednesday- Baked potatoes and salad bar
Thursday- Sesame chicken stir fry and noodles
Friday- Chili and corn bread
Saturday and Sunday are YOYO days.
This post is linked to Organizing Junkies, Menu Plan Monday
Monday- Taco Night
Tuesday- Breakfast for Dinner- cheesy scrambled eggs, bacon, and toast
Wednesday- Baked potatoes and salad bar
Thursday- Sesame chicken stir fry and noodles
Friday- Chili and corn bread
Saturday and Sunday are YOYO days.
This post is linked to Organizing Junkies, Menu Plan Monday
Friday, October 7, 2011
Monster iron- on sets, Make your own Halloween shirts
The other day while I was in Target, I happened to find these cute little iron-on Monsters. I thought these would make a great Halloween craft project for the kids. They were on clearance at my local Target for $1.24. You get 2 pages, one is the monster body and the other is different eye and mouth combinations. We are going to be making ours this weekend. Check out your local Target, there were some other designs.
Tuesday, October 4, 2011
Star Wars on Blu Ray, I have a love/hate relationship with it
So now the entire Star Wars saga is out on Blu Ray. I am not sure how I really feel about it.
First off, the deleted scenes for the original movies are great. Loving the originals as much as I do, I was really excited to see the deleted sand storm scene from Jedi, Luke with his friends in ANH. Those were great! It was fun to finally see these scenes that you had only ever heard of. However, you would think more from the newer movies could have been added. What about all the scenes where the Rebel Alliance starts to form? Don't you think we deserve those scenes, since it is a major part of the original story. I have never understood why those were left out.
Secondly, the color is amazing! The original pictures have never looked better. The holo chess game really stood out. The figures have always been kind of gray and dull, but now you see the detail in the monsters. So great job on the color.
But, I would dearly love an answer as to WHY? can they not fix the scene in the cantina with Han and Greedo? I have hated the fact that they allowed Greedo to shoot first in the 1995 Special Editions. We all know Han shot first!!! But it back the way it was!! By changing this scene, Lucas damaged the character of Han Solo. ( Let's not talk about what he did to Vader, all I have to say is Episode 3, enough said.)
The Blu Ray would have been an excellent opportunity to correct this hideous mistake. Or show the two versions of the scene or better yet, let the viewers pick between the original version or the special edition nonsense. While I spent $80 to get the Blu Ray set, I personally prefer dragging out my old 13 inch TV with a VCR built in. Why you may ask, would I prefer the now primitive media? Simple, because I can watch the original trilogy in it's un-tampered state. The way we watched it in the 80's and gosh darn it, we liked it that way!!
 So now that I am done with my little rant, I thought I would share a few pictures. Walmarts had Blue Ray midnight release parties at some of their stores. We got invited to dress up and mingle with the Walmart shoppers. ( I am totally hoping that someone who came, posts a picture on the People of Walmart site.) There is nothing more fun then running around Walmart at midnight, dressed in a Star Wars costume!
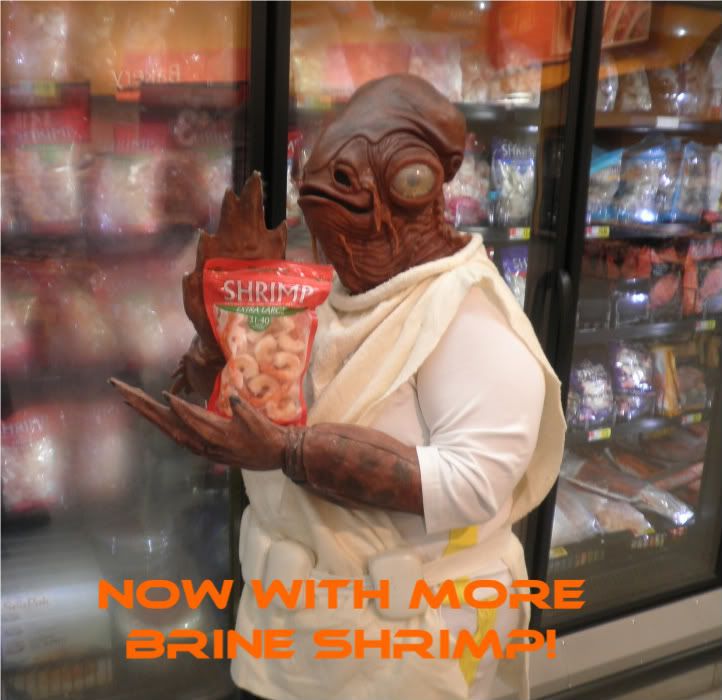 This is me. I love dressing in my Admiral Ackbar costume. If you haven't seen the Star Wars Robot Chicken, check out the Admiral Ackbar cereal bit. That is what this picture is all about.
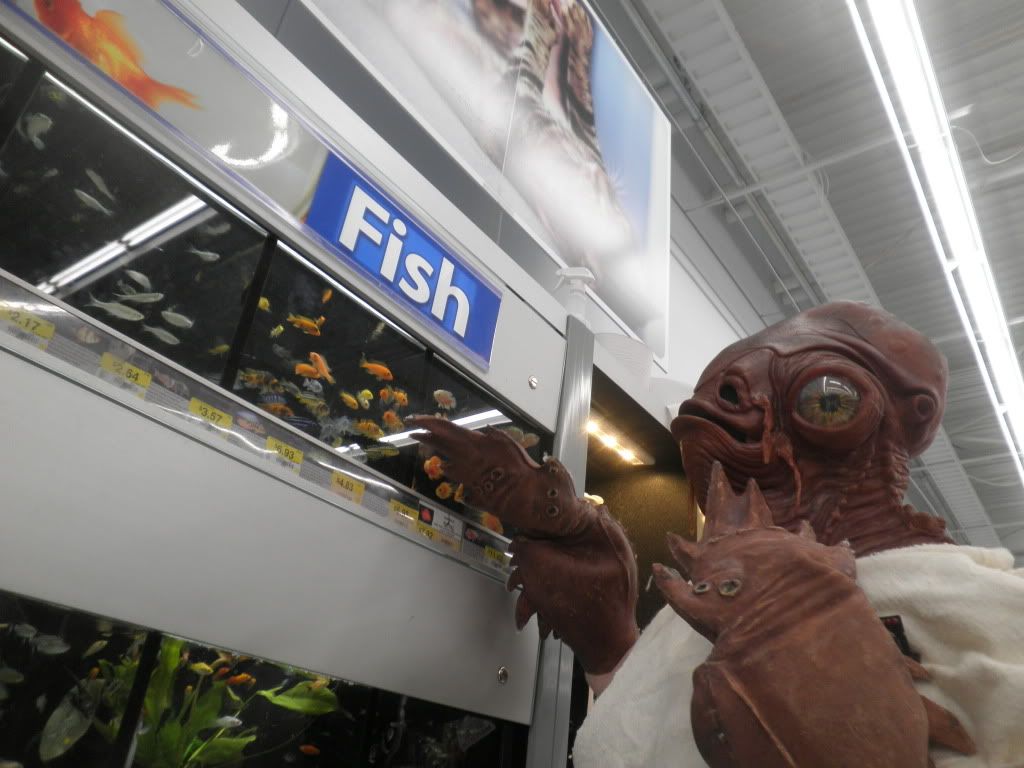 The Admiral is looking for a new pet.
First off, the deleted scenes for the original movies are great. Loving the originals as much as I do, I was really excited to see the deleted sand storm scene from Jedi, Luke with his friends in ANH. Those were great! It was fun to finally see these scenes that you had only ever heard of. However, you would think more from the newer movies could have been added. What about all the scenes where the Rebel Alliance starts to form? Don't you think we deserve those scenes, since it is a major part of the original story. I have never understood why those were left out.
Secondly, the color is amazing! The original pictures have never looked better. The holo chess game really stood out. The figures have always been kind of gray and dull, but now you see the detail in the monsters. So great job on the color.
But, I would dearly love an answer as to WHY? can they not fix the scene in the cantina with Han and Greedo? I have hated the fact that they allowed Greedo to shoot first in the 1995 Special Editions. We all know Han shot first!!! But it back the way it was!! By changing this scene, Lucas damaged the character of Han Solo. ( Let's not talk about what he did to Vader, all I have to say is Episode 3, enough said.)
The Blu Ray would have been an excellent opportunity to correct this hideous mistake. Or show the two versions of the scene or better yet, let the viewers pick between the original version or the special edition nonsense. While I spent $80 to get the Blu Ray set, I personally prefer dragging out my old 13 inch TV with a VCR built in. Why you may ask, would I prefer the now primitive media? Simple, because I can watch the original trilogy in it's un-tampered state. The way we watched it in the 80's and gosh darn it, we liked it that way!!
 So now that I am done with my little rant, I thought I would share a few pictures. Walmarts had Blue Ray midnight release parties at some of their stores. We got invited to dress up and mingle with the Walmart shoppers. ( I am totally hoping that someone who came, posts a picture on the People of Walmart site.) There is nothing more fun then running around Walmart at midnight, dressed in a Star Wars costume!
 This is me. I love dressing in my Admiral Ackbar costume. If you haven't seen the Star Wars Robot Chicken, check out the Admiral Ackbar cereal bit. That is what this picture is all about.
  The Admiral is looking for a new pet.
Monday, October 3, 2011
Sunday Scavenger Hunt
It has been a while since I participated in a Sunday Scavenger Hunt. I don't really have any new pictures for this week, so I pulled some older pictures from the summer. Hopefully, next week I will have some new photos.
inspired by book or movie - I used this picture from a hot air balloon festival. I thought it could represent Around the World in 80 Days.
brown

hazy- This one is probably a stretch, but I just really thought the picture was interesting and it does kind of have a hazy quality to it.
coffee or tea

linger- I don't really have any thing for this.
inspired by book or movie - I used this picture from a hot air balloon festival. I thought it could represent Around the World in 80 Days.
brown

hazy- This one is probably a stretch, but I just really thought the picture was interesting and it does kind of have a hazy quality to it.

coffee or tea

linger- I don't really have any thing for this.
Project 64: Out of the Box Periwinkle
I have 2 pictures that I really love, but I just can not decide which one captures the color the best. This picture was taken during a trip to the aquarium. I just love the back light that the jellyfish have.
The second picture, I took when my children and I visited a local playground. It is the interior of the spiral slide. I just thought it looked interesting and decided to snap it.
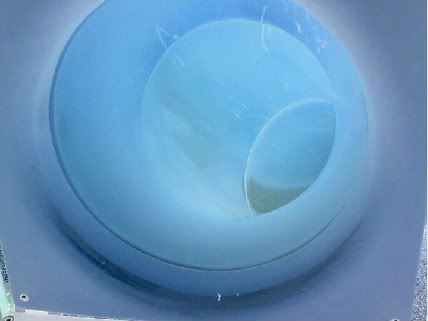
The second picture, I took when my children and I visited a local playground. It is the interior of the spiral slide. I just thought it looked interesting and decided to snap it.

Menu Plan Monday
It's been a while since I posted a menu plan. I really have been a slacker the last couple of months. I am excited about Fall. The weather the past weekend, was just perfect Fall weather. I am really getting in the mood to make soup. I just love all the warm comfort foods and Fall flavors.
Monday- Taco Soup, corn bread, organic mixed green salad
-leftovers for lunch the next day
Tuesday- Jerk Chicken with rice
Wednesday- Cheese ravioli with butternut squash, garlic bread, mixed green salad. This is a new recipe I found in the October 1 issue of Woman's Day Magazine. It looked like something my family would enjoy. I will have to post later about how it turns out.
Thursday- Veggie Burgers, asian cole slaw and fresh fruit
Friday- Make your own calzones. Cheese, mushrooms, olives, onions, pepperoni, green pepper, etc.
Saturday and Sunday are YOYO days.
This post is linked to Menu Plan Monday
Subscribe to:
Comments (Atom)


